A brief tutorial
PYME is a very powerful framework but for that very reason also can be complex to use. In addition, the documentation often does not keep pace with the introduction of exciting new features. In a loose sequence of blog entries we will illustrate a few specific tasks in PYME which hopefully will be useful for other PYME users.
Installing PYME
The following assumes you have a running copy of PYME. The quickest way to install is probably following steps 1-3 on David's main PYME installation page.
Open your PSF stack
The first step is to open the PSF stack in dh5view, this is a step that may require you to provide some info about your data if it was not recorded with PYME itself.
David provides some instructions how to import your data. Basically, you need to provide some essential metadata in a .md file. Once that is done you can open your file by typing in a terminal
dh5view <filename>.tif
Alternatively, just start dh5view using the GUI and then use the File>Open dialog to read your file. Finally, there are pretty straightforward ways to set things up, in both macos and windows, so that the opening can be done just using GUI commands, e.g. Open with... in the windows FileManager etc. Perhaps material for another blog entry.
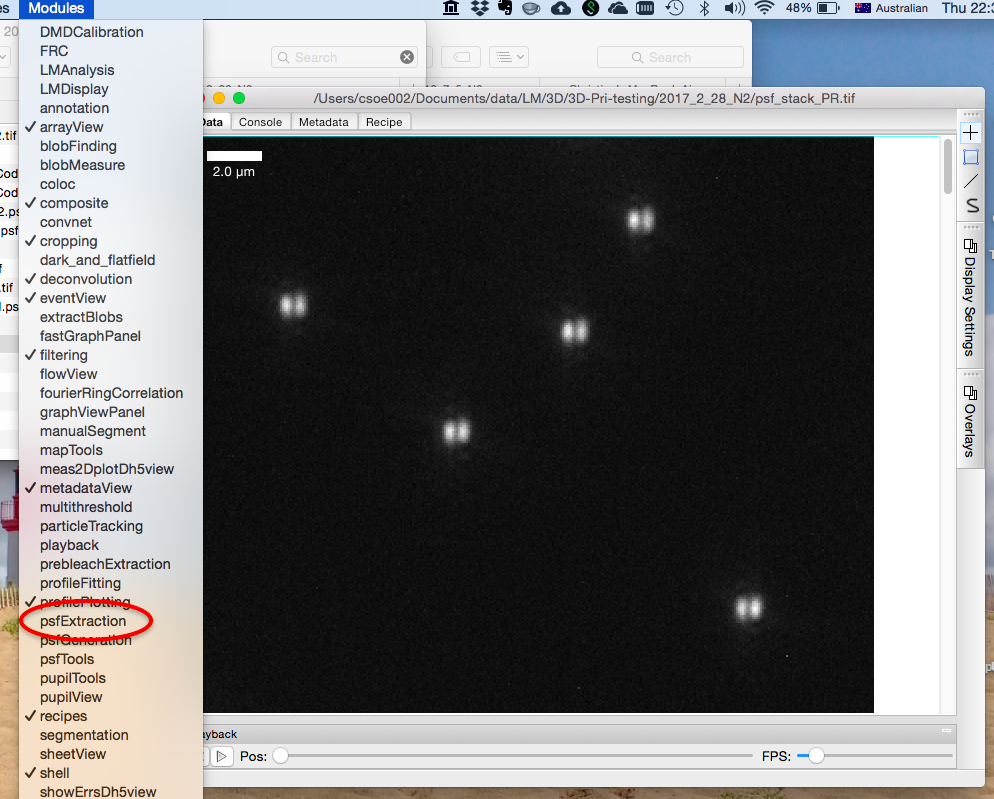
Loading the PSF Extraction module
Once you have opened your psf stack, you should load the psfExtraction module, as shown in the screenshot below.
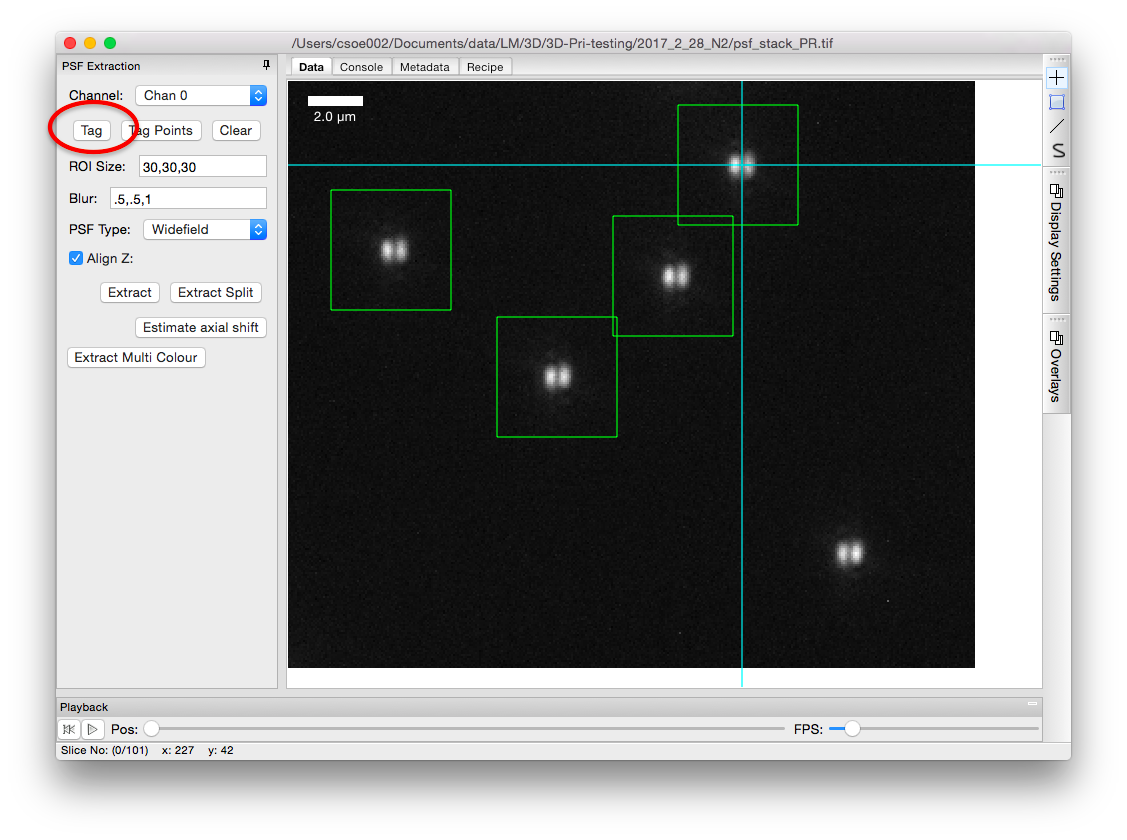
Tag PSF candidates using the crosshair tool
The next step is to tag psf candidates with the crosshair selection tool (selectable atthe top right, it is selected by default). You only need to click near the center of a PSF image and then press the Tag button.

Repeat for all candidates and then extract
At this stage all you need to do is repeat this for all candidates. Each successfully tagged psf image gets a green box around it.
NOTE: The size of the green boxes which delineate the ROI (region of interest) to be extracted is controlled by the ROI Size parameters (three entries for x, y and z direction). The parameters choose the half size, the actual size extracted will be 2*ROI Size + 1 (i.e. in our example we go 30 pixels to the left of our centre and 30 pixels to the right for x, similar for y and z).
IMPORTANT: If the ROI sizes are so large that the green boxes go beyond the edges of the stack (generally only a problem if the stack is too small or poorly centred on the PSF images), this will result in a somewhat cryptic error when it comes to the extraction step. Watch out for that.
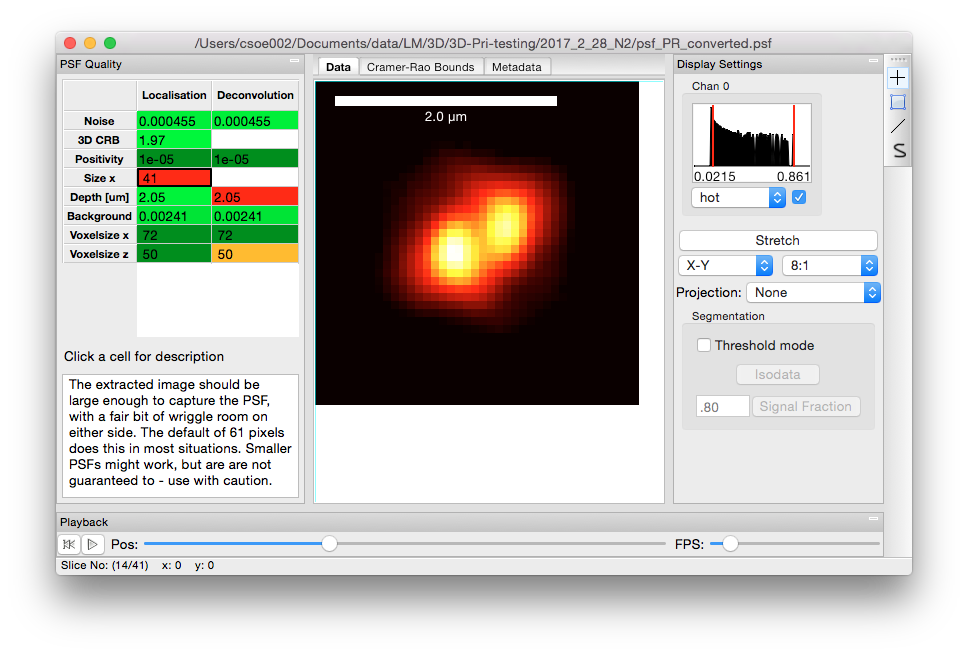
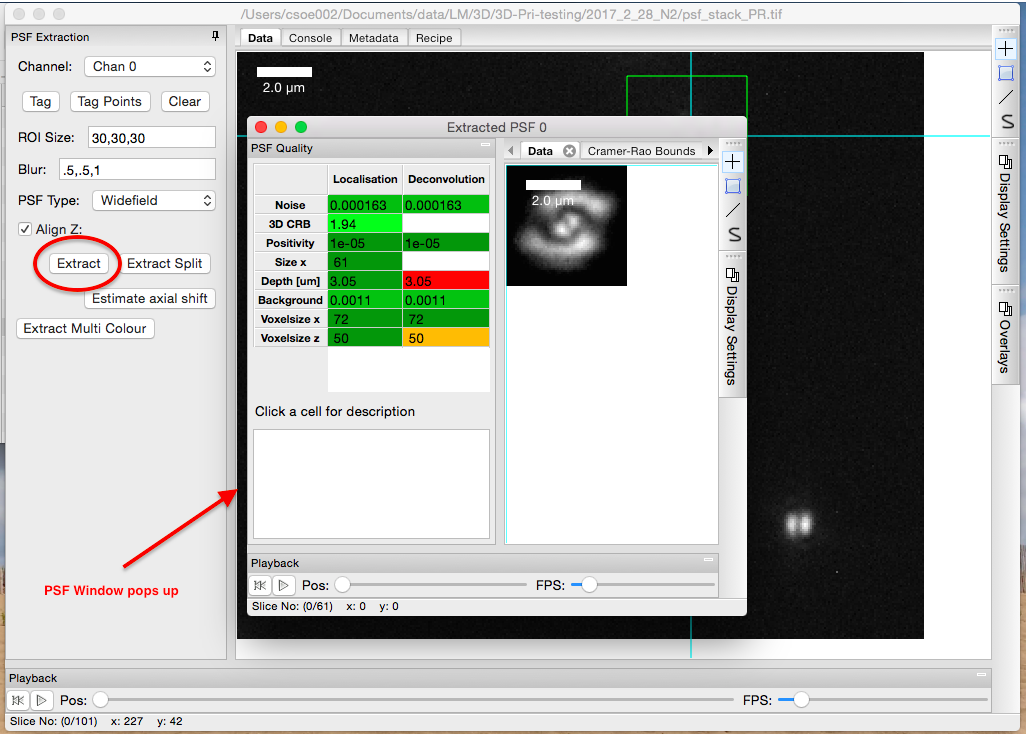
Once done press Extract, and a new window with the extracted PSF should pop up.
Save the extracted PSF
Make sure the PSF window has focus and select Save as from the menu
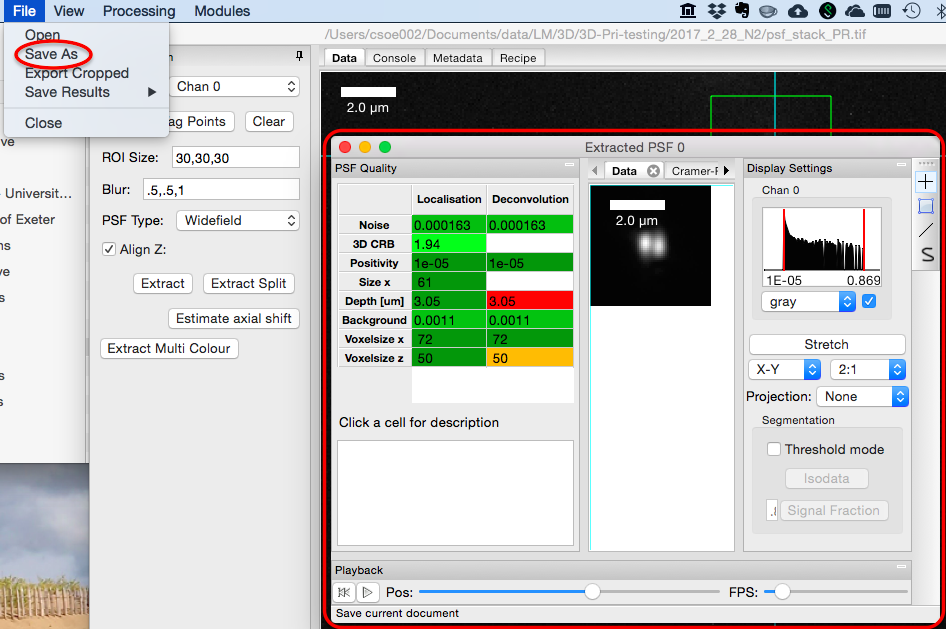
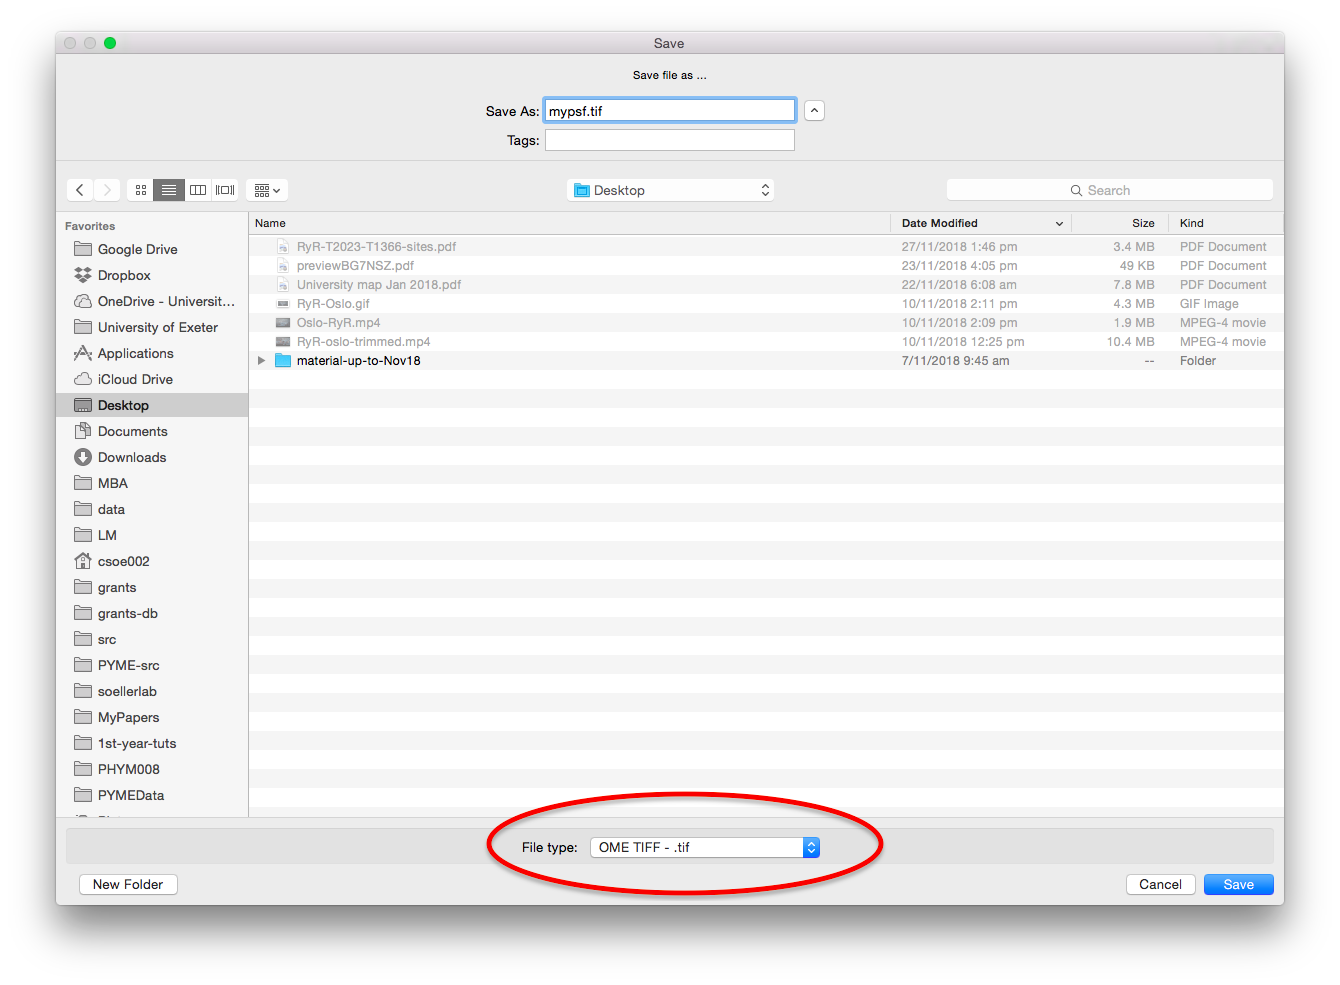
The dialog that comes up allows you to enter the name, but more importantly, I advise to select the OME TIFF format for portable storage (rather than the default .psf format).
PYME extract PSF documentation
At this stage I will point out David's PSF Extraction Documentation. it has most of the points given here and also explains a few other aspects, i.e. the other parameters you can edit (e.g. the size of the volume to extract around each bead) and the other modes of PSF extraction, e.g. for multi-channel data, etc.
Here we paid a little more attention to points that may be useful for a novice user of PYME.